Roman Currency
The Importance of Currency
Trade has been an essential element of human civilization from it's emergence up to the modern day, and this was certainly no different for the Romans, who built one of the largest empires in history. The presence of an almost ubiquitous currency helps to facilitate trade by creating a medium of exchange that has a universal 'store of value'. This universal method of exchange makes trading between people faster and easier, as both parties recognise an intrinsic value in the currency.
In the ancient world metals such as silver and gold were prized for their scarcity when compared with most other commodities. In addition, as these metals are more easily worked than other precious materials (such as precious stones), they came to widespread use among many cultures as a form of currency. Bronze - although it is not a precious metal - also found common use in currency, typically for lower denominations. This is known as 'commodity money', in which the value of the currency is commensurate with the value of the materials from which it is made. Romans adopted coinage based currency later than other Mediterranean cultures. Before the mid-Republic (c.300BCE) the Roman Republic primarily used bronze ingots as a form of currency, which was also common for the period and region. However, here we will focus primarily on coins as they comprised the majority of the currency for most of Roman history.
Understanding Ancient Coins (Numismatics)
The study of coins and other forms of currency is known as numismatics. Many people collect coins for personal or hobby reasons, but for ancient historians coins provide a vital resource for understanding not only the currency of the past but also the wider society. The images and text on coins often reflect events and sentiments important to the ruling class, and they used coins to communicate these to the wider populace. In this sense, coins are a form of propaganda for powerful people who control the minting and creation of money. Coins must always be considered with this in mind, as many may not necessarily reflect the wider spirit of the people, so to take them at face value would be misleading. Nonetheless, coins also provide other important information by allowing archaeologists to approximately date archaeological sites based on the deposition of coins at the site.
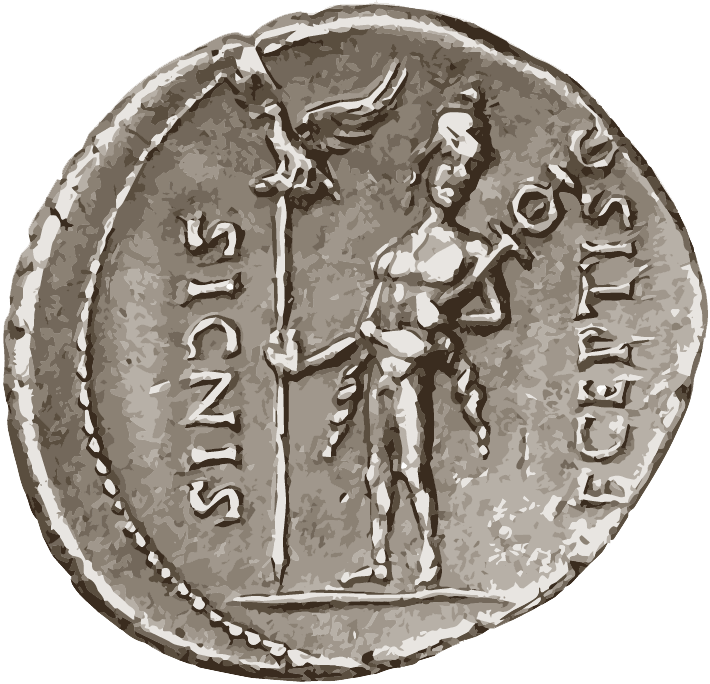
Specific terminology is used when referring to the different parts of a coin in numismatic studies that make up a numismatic nomenclature. These terms are not colloquial, so in order to better understand ancient coins it can be beneficial to familiarise oneself with these terms. It is easiest to first break down the coins by their different sides. You can then explore the different parts of the coin presented here by clicking on the various elements on each side.
Click on different parts of the coin below to see more information!
The Obverse ('Heads')
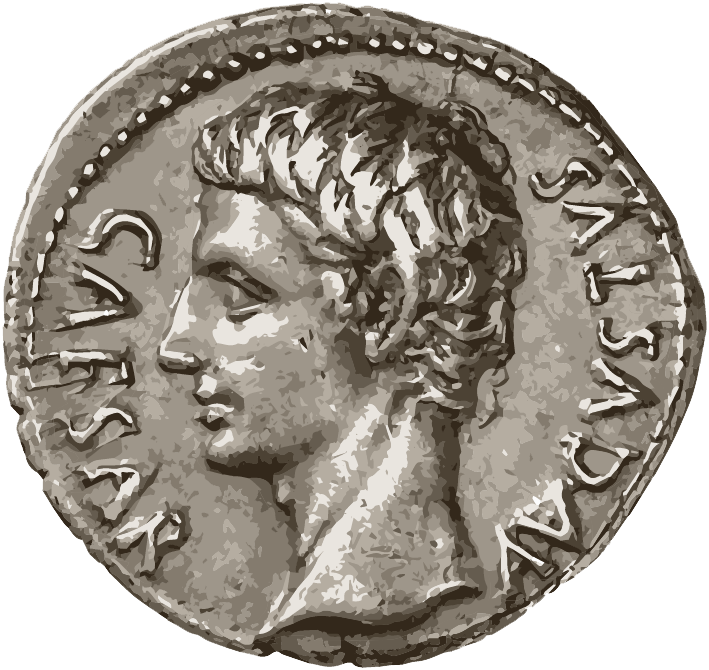
The obverse (Fig. 01) is typically identified as the side with a portrait at its centre. This would often be of the emperor, king, or other leading figure like an elected official. However, this was not always the case, and early coins were not minted with the portrait of living people but rather only with portraits of gods. In the Roman Republic the first minting of a coin with a living person's portrait was first done by a Greek polis (city) in honour of the Roman general who had 'liberated' the city. While this is the first coin portrait of a Roman that we have, the first individual Roman to mint a coin with their own portrait on it was Julius Caesar. Many of his contemporaries saw this as an affront to tradition and it was considered a signifier of Caesar's hubris.
The obverse of a coin usually contains the following elements:
- Bust portrait
- Legend
- Border
The Reverse ('Tails')
The reverse (Fig. 02) is the side of the coin which often has a more varied design that relates to current events or sentiments. It is here that rulers and emperors would place images that they wanted to put forward to the populace. Most often this would espouse their victories or positive qualities, thereby legitimising their rule. Here too a legend would often be placed that helped give greater context to the central design of the coin's reverse. The reverse of the coin would also occasionally have a date in the form of a year, and sometimes a mintmark, siginifying where the coin was produced in the republic/empire by denoting the specific coin mint. These more minute details would often be placed in the 'exergue', which is to say the space just below the reverse's central design. Overall, the varied design of reverse's provides a great wealth of information about the motivations of different rulers, as well as what those rulers thought was important to the wider populace.
The reverse of a coin usually contains the following elements:
- Central design
- Legend
- Exergue
- Mintmark
- Border
The Minting Process
The creation of coins was an important and state controlled industry. Just like in the modern day, forgeries were a problem, as one could not necessarily verify whether a coin was the pure precious metal, or a mixed metal with a precious gold or silver wash on the surface. For this reason states oversaw the production of engraved dies that both communicated the message desired by the ruler, as well as provided some assurance that the coin was genuine and produced at a state mint. Additionally, ensuring that each coin, in each denomination, weighed the same amount was necessary to make fair transactions possible. Once the metal for the coins had been obtained and purified through smelting there were three principle steps in minting coinage, namely moulding blanks, engraving dies, and striking the coins.
Step 1: Producing Blanks
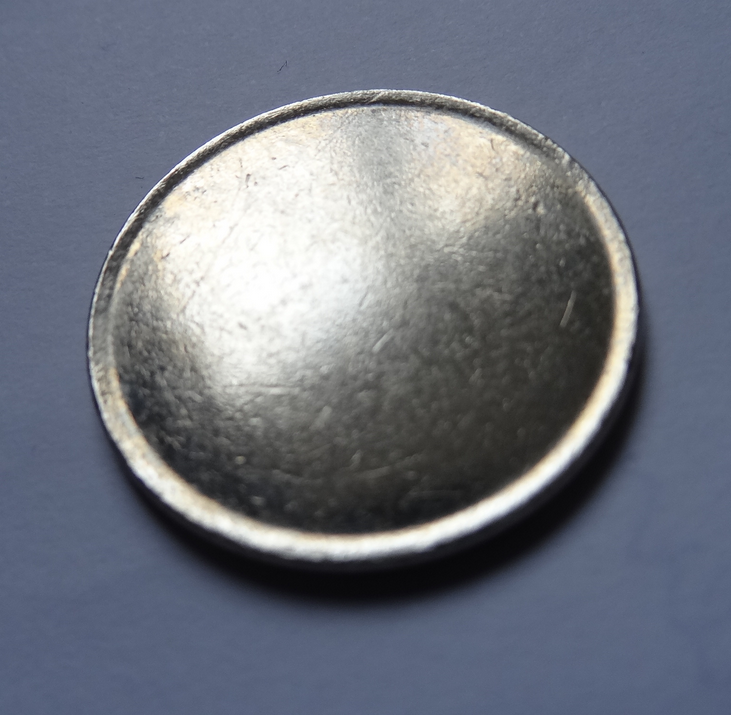
The first step in creating a coin is, as one might expect, creating a flat, circular piece of metal that is the right size, weight, and material. These are commonly called 'blanks' (Fig. 03) but may also be referred to as 'planchets' or 'flans'. In ancient times, once the metal had been refined, the molten metal would be poured into a pre-made mould of clay, either for a group of coins, or an individual coin for high value denominations. After the metal blank had cooled it was removed from the mould and imperfections were cleaned off of it to prepare for the striking process. The usage of moulds created conformity among all the different coins, ensuring that they were all the same size and weight, and therefore the same value based upon their measured metal contents.
Step 2: Engraving Dies
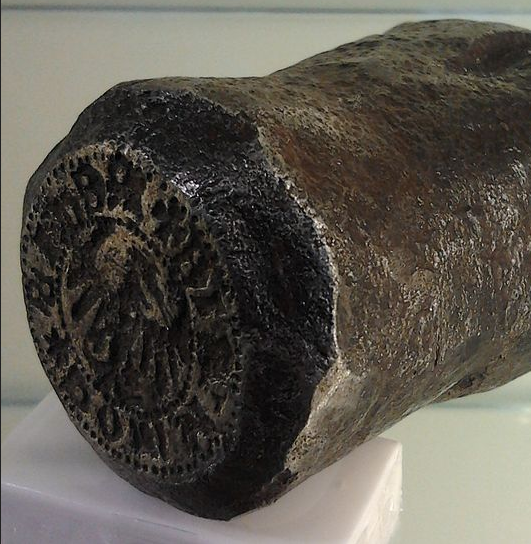
A 'die' (Fig. 04) is a metal, often cylindrical object, which was used to strike the image onto the coin. Master engravers would be tasked with carving the ruler or states desired imagery and text onto the die. As such, for each coin struck there would be two dies, one for the obverse, and one for the reverse. These images would be engraved onto the die over a long and detailed work process in which the artist would engrave the image in relief in a depression on the die. The image engraved on the die would also be in reverse, so that when struck onto the face of the blank it would appear the correct way around for the observer of the coin. Dies were tightly controlled, and it is assumed destroyed after the engraved coin was no longer produced, in order to prevent them falling into the hands of forgers. As a result almost no dies survive in the archaeological record from the Roman period, and modern forgeries remain an issue for collectors.
Step 3: Striking the Coins
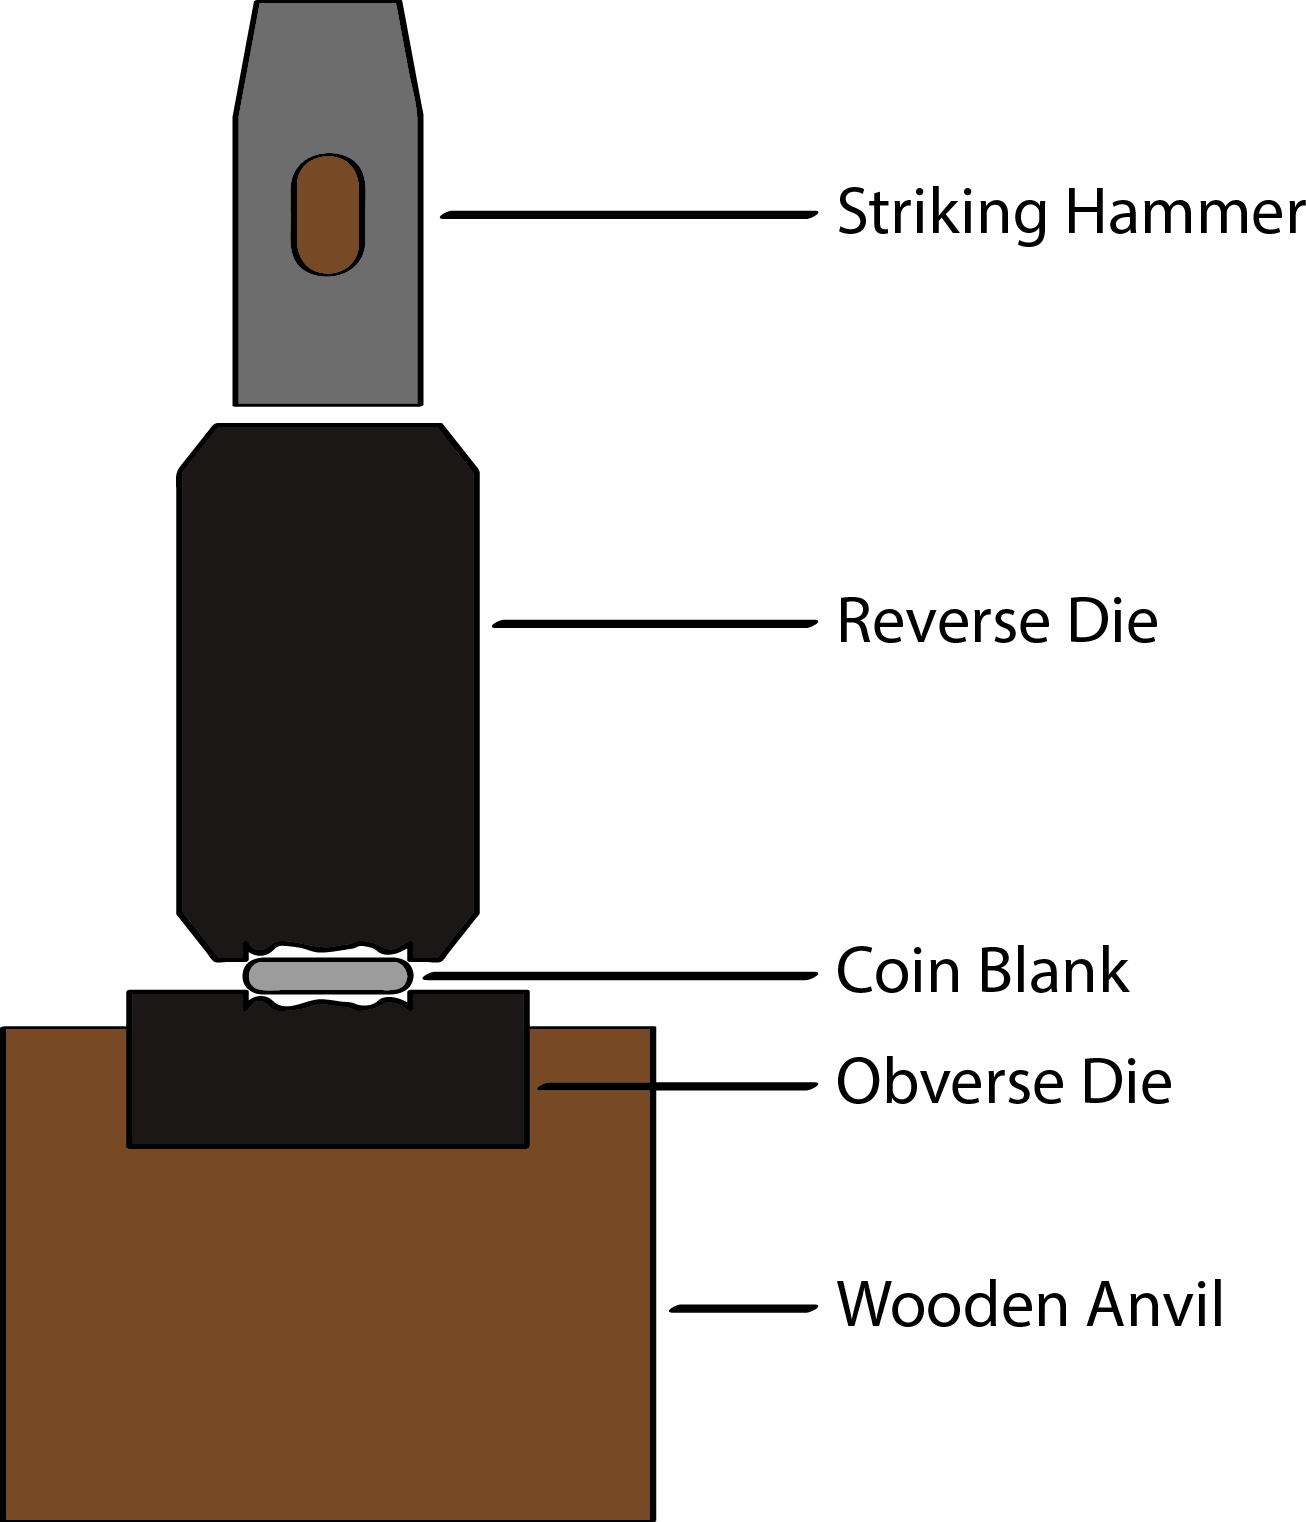
Once the minter had both the required blanks, and appropriate dies, the coin could be struck. Striking the coin (Fig. 05) would impress the design from each die onto each respective side of the coin at the same time. To do this one of the dies - typically the obverse die - would be placed into an anvil in order to keep it steady, the blank would be heated and placed on top, and then the reverse die would be placed above. Once all the three pieces were in place the minter would strike the top of the reverse die, impressing the relief designs onto both sides of the coin. This process would wear down both dies over time, although whichever die was struck with the hammer would wear down faster as it took the blunt of the impact. It is for this reason that many ancient coins - unlike modern ones - have an irregular shape around the edges, despite coins in the same denomination being the same weight.